How To Install Felt Shingles In 4 Easy Steps

Over the years, felt shingles have become popular among homeowners since they are lightweight and a cheaper alternative to cedar shingles, especially for roofing garden sheds, garages and extensions. However, they can be fitted to most roof types, including timber buildings, porches, gazebos and other outbuildings.
While felt shingles are not as durable as other roofing materials, they can be stylish and versatile, and they are often easy to fit, replace and remove. Besides, they are known to last for around 20 years while offering protection from different weather elements, be it the sun, wind, rain, or snow. And there are a greater variety of felt shingles you can buy, available in a variety of shapes and colours, and felt shingles that can be fitted by yourself, saving you time and reducing labour and material costs during installation.
Do felt shingles need underlay?
It is generally recommended to fit a roofing underlay between felt shingles and the roof deck, especially if your roof has had humidity or condensation issues in the past. In such circumstances, you should consider fitting a breathable underlay membrane to allow for proper air circulation. However, an underlay must be fitted if your roof slope is only slightly slanted - less than 20 degrees. This is to prevent water from entering your property because felt shingles do not have water-absorbing properties and can let water seep in if fitted incorrectly.
Installing felt shingles in 4 steps:
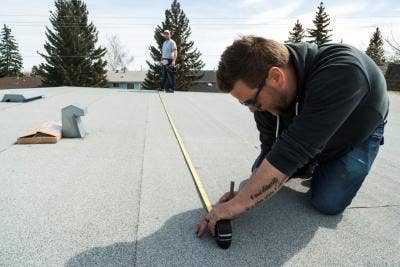
1. Prepare the roof for installation and fit the underlay on the roof deck
Once you have the right tools and materials needed for the job, you can start by inspecting the surface of the roof deck and securing any loose nails and uneven boards, clearing debris while ensuring an even surface before starting any roof installation. Roofing felt underlay should be cut to size and laid on the roof - with around 150mm overlap at the verge - before fixing it with large head galvanised clout nails.

2. Start from the bottom and sides, and work your way up
After securing the roofing felt underlay to the roof, begin by placing a strip of felt shingles along the bottom edge of the roof, with the shaped part facing upwards, while allowing for a 50mm overhang at the eaves. The overhang can either be fitted into the guttering system or nailed to the underside of the roofing deck (50mm apart) to prevent water damage to the wooden structure beneath. The top end of the felt shingle strip should be nailed down 150mm apart using large head clout nails.
3. Fit the felt shingles straight and overlap the top of the cut-out onto the shingles beneath
You can lay down your first strip to the roof deck, making sure that the bottom of the felt shingles align with the eaves and the sides line up with the verges. Nails should be placed just above the tile joints, and adhesive can be applied to secure the felt shingles to the eaves. For the verge, you can apply some adhesive to the strip before nailing it down.
You can repeat the same process for fitting the second and subsequent felt shingle strips while ensuring the top of the cut-outs is overlaid to the felt shingles underneath. This should be laid in a broken bond or irregular pattern, where each course alternates for a more traditional design. You can move on to the final step once both slopes of the roof are done.
4. Finish Ridge and hip details
The final step is to finish any ridge or hip details. This can be done by cutting one of your strips into individual shapes and tapering the upper edge. These can then be fitted to the roof by bending the shingle over the ridge or hip and securing it with some adhesive and galvanised clout nails. The next shingle tile should overlap the preceding tile, and so on until the ridge is finished.

Our Top Videos.

How to install a Velux Integra Electric Roof Window (5 Parts)
In this five-part guide, we take you through the full installation of a Velux GGU Centre Pivot Integra Roof Window onto an...

How to install a Duratech Centre-Pivot Pine Roof Window
Once you begin unpackaging the window, you’ll find in the box the brackets, the handle and the fixings. And there will also be some instructions...

How to install a Velux Centre-Pivot Roof Window (4 Parts)
In this four part guide, Mark Dymond – Velux Technician installs a Velux GGU Centre Pivot Roof Window onto an Interlocking Tile Roof...
Ideas & Advice
How-tos, tutorials and videos

How and why to use or snap a chalk line
Chalk lines are the fastest way to mark straight guidelines on flat surfaces. They are used extensively in the building and construction industry to speedily and accurately ‘draw’ straight lines between two points. Chalk lines are inexpensive tools...

Skylight Blinds: A Guide To The Different Types
Like many household product, blinds for skylight windows come in all shapes, sizes, and materials. Some are designed with a tangible purpose in mind, while others are more for show. One thing’s for sure - buying any type of skylight blind...

Steve's Steals | Week 1 | Irwin Jack Handsaw 20" at only £2.50+VAT
Blimey £2.50+VAT for an Irwin Plus 880 Universal Jack Handsaw 20”/500mm, that really is a Steve’s Steal.

Steve's Steals Dropping Friday 12 April
Steve’s Steals is a carefully curated range of JJ Roofing Supplies best selling, most desirable items handpicked by Steve and priced at an unbeatable, almost unbelievable price.
Painting Roof Tiles: A Comprehensive Guide
Transforming the appearance of your home can be as simple as giving your roof a fresh coat of paint. Not only does painting roof tiles boost curb appeal, but it can also extend the life of your roof by providing additional protection against the elements. In this comprehensive guide, we'll go through every step of the process, from preparation to aftercare, ensuring a hassle-free and stunning result. So whether you're contemplating roof paint options or simply wondering, "can you paint roof tiles?" you've come to the right place. Let’s dive in.
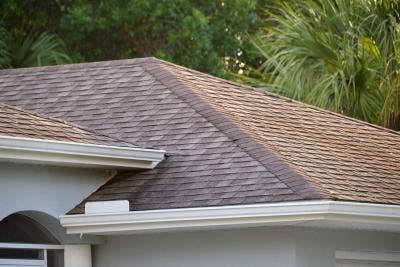
Shingles vs. Tile Roofs: Pros, Cons, and Comparison
When it comes to selecting the right roofing material for your home, it's essential to weigh the pros and cons of the two most popular choices on the market: shingle and tile roofs. This comparison will guide you through the critical factors to consider, such as longevity, cost, and aesthetic appeal, ensuring you make an informed decision tailored to your needs and preferences.
What is a Roofing Square?
Whether you're a seasoned DIY enthusiast gearing up for a roofing project or a homeowner aiming to make informed decisions about your property, understanding the concept of a roofing square is essential for your project’s success. But what actually is it? In this blog post, we’re going to delve into the essence of a roof square, providing you with the knowledge to navigate the roofing landscape more effectively. From defining what exactly a roofing square is to highlighting its significance in roofing projects, we've got you covered. Let’s dive in!